Deploying Your First Backend API to a Real Server
SSH into a VPS, keep your process running with systemd, put Nginx in front of it, and survive your first production incident. The backend deployment fundamentals nobody writes down.
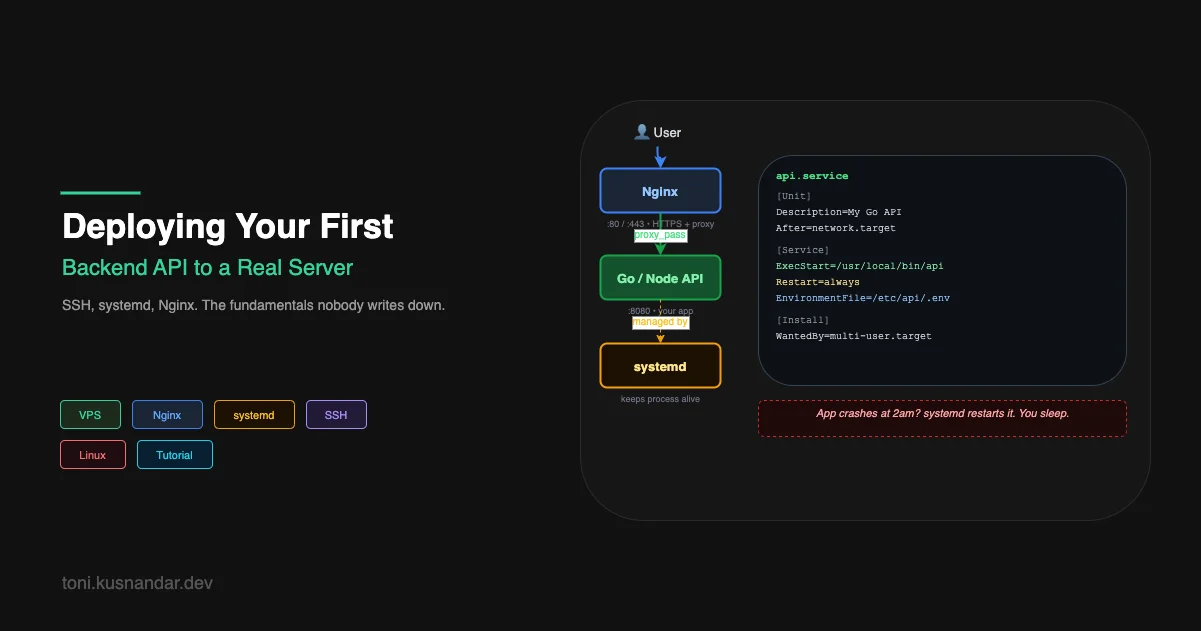
Deploying a frontend is mostly a file copying problem. Deploying a backend API is a process management problem. The distinction matters because the failure modes are completely different.
A static HTML file does not crash. It does not run out of memory. It does not deadlock waiting for a database connection. Your backend does all of those things, usually at the worst possible time.
This article is about the first real backend deployment: getting your API running on a VPS, keeping it running, and knowing what to do when it stops.
Getting a VPS
A VPS (Virtual Private Server) is a slice of a real physical machine that you rent by the month. You get root access, a public IP address, and full control over what runs on it.
For learning, any of these work fine:
- DigitalOcean Droplet: $6/month for 1 vCPU, 1GB RAM
- Hetzner Cloud: €3.29/month for 2 vCPU, 2GB RAM (better value in Europe)
- Linode (now Akamai): $5/month for 1 vCPU, 1GB RAM
Pick one, create an Ubuntu 22.04 server, and add your SSH public key during setup.
# Generate an SSH key if you do not have one
ssh-keygen -t ed25519 -C "your@email.com"

# Copy your public key — paste this into your VPS provider's SSH key field
cat ~/.ssh/id_ed25519.pub
When the server is provisioned, SSH in:
ssh root@YOUR_SERVER_IPYou are now on a Linux machine on the internet. Take a moment to appreciate that.
The First Thing You Do on Any New Server
Before touching your app, lock the server down a little:
# Create a non-root user
adduser deploy
usermod -aG sudo deploy

# Copy your SSH key to the new user
mkdir -p /home/deploy/.ssh
cp ~/.ssh/authorized_keys /home/deploy/.ssh/
chown -R deploy:deploy /home/deploy/.ssh
chmod 700 /home/deploy/.ssh
chmod 600 /home/deploy/.ssh/authorized_keys

# Disable root SSH login
sed -i 's/PermitRootLogin yes/PermitRootLogin no/' /etc/ssh/sshd_config
systemctl restart sshd
Now SSH in as your deploy user:
ssh deploy@YOUR_SERVER_IPYou have sudo access when you need it, but you are not running everything as root. A misconfigured command as root can ruin your day. As a regular user, the blast radius is smaller.
Getting Your Code There
Three realistic options:
Option 1: git clone directly on the server
# On the server
git clone https://github.com/yourusername/your-api.git /home/deploy/app
cd /home/deploy/app
go build -o bin/server ./cmd/api
Simple. The downside is your server needs Go installed, and it pulls source code rather than a compiled artifact.
Option 2: Build locally, copy binary with scp
# On your laptop - build for Linux
GOOS=linux GOARCH=amd64 go build -o bin/server ./cmd/api

# Copy to server
scp bin/server deploy@YOUR_SERVER_IP:/home/deploy/app/server
Cleaner. The server only needs your binary, not a build environment. This is closer to how real deployments work.
Option 3: Pull from an artifact store (later)
Once you have CI/CD, your pipeline builds the binary, uploads it to S3 or a container registry, and the server pulls from there. We will get to this in article 7.
For now, option 2 works fine. Build locally, copy with scp, run on the server.
The Process Management Problem
Here is the mistake every developer makes the first time:
# On the server - run the app
./server
# Works! API is responding.

# Close the terminal session...
# App is dead.
When you close an SSH session, any processes you started in that session get a SIGHUP signal and typically terminate. You need a process manager that keeps your app running independently of your terminal session.
The right tool on Ubuntu is systemd. It is already there, it manages every system service, and it is what you want.
Create a service file:
sudo nano /etc/systemd/system/my-api.service[Unit]
Description=My API Server
After=network.target
[Service]
Type=simple
User=deploy
WorkingDirectory=/home/deploy/app
ExecStart=/home/deploy/app/server
Restart=always
RestartSec=5
StandardOutput=journal
StandardError=journal
# Environment variables
Environment=PORT=8080
Environment=DATABASE_URL=postgres://...
[Install]
WantedBy=multi-user.targetEnable and start it:
sudo systemctl daemon-reload
sudo systemctl enable my-api    # start on boot
sudo systemctl start my-api     # start now
sudo systemctl status my-api    # check it is running
Now your app survives disconnects, crashes (it restarts after 5 seconds), and server reboots. That is the minimum for a real deployment.
Check logs with:
journalctl -u my-api -f    # follow logs in real time
journalctl -u my-api -n 100  # last 100 lines
Nginx as a Reverse Proxy
Your app listens on port 8080. Users expect port 80 (HTTP) and 443 (HTTPS). You could run your app on port 80 directly, but there are good reasons not to:
- Ports below 1024 require root privileges. You do not want your app running as root.
- You might run multiple apps on the same server.
- Nginx handles TLS termination, compression, and request buffering better than most app frameworks.
Install Nginx:
sudo apt update
sudo apt install nginx
Create a site configuration:
sudo nano /etc/nginx/sites-available/my-apiserver {
listen 80;
server_name api.yourdomain.com;
location / {
proxy_pass http://127.0.0.1:8080;
proxy_http_version 1.1;
proxy_set_header Upgrade $http_upgrade;
proxy_set_header Connection 'upgrade';
proxy_set_header Host $host;
proxy_set_header X-Real-IP $remote_addr;
proxy_set_header X-Forwarded-For $proxy_add_x_forwarded_for;
proxy_set_header X-Forwarded-Proto $scheme;
proxy_cache_bypass $http_upgrade;
# Timeouts
proxy_connect_timeout 60s;
proxy_send_timeout 60s;
proxy_read_timeout 60s;
}
}Enable it:
sudo ln -s /etc/nginx/sites-available/my-api /etc/nginx/sites-enabled/
sudo nginx -t    # test config
sudo systemctl reload nginx
Add HTTPS with Let’s Encrypt:
sudo apt install certbot python3-certbot-nginx
sudo certbot --nginx -d api.yourdomain.com
Certbot modifies your Nginx config to handle SSL and sets up automatic renewal. Free HTTPS in about two minutes.
Your setup now looks like this:
Internet → Nginx (port 443, TLS) → your app (port 8080, localhost only)Nginx handles the public-facing part. Your app handles only local connections. Clean separation.
The First Production Incident
At some point your app will stop responding. Maybe it crashed. Maybe it ran out of memory. Maybe a database connection pool got exhausted. Here is what to check, in order:
# Is the process running?
sudo systemctl status my-api

# If it is crashed, why?
journalctl -u my-api -n 50

# Is Nginx healthy?
sudo systemctl status nginx
sudo nginx -t

# Is something consuming all memory?
free -h
top

# What is listening on port 8080?
sudo ss -tlnp | grep 8080

# Can you reach your app directly, bypassing Nginx?
curl http://127.0.0.1:8080/health
This sequence has saved me probably a hundred times. Check the process, check the logs, check the proxy, check resources, check connectivity. In that order.
Most problems are in the logs. Learn to read them fast.
Deploying Updates
Once your app is running, deploying updates looks like this:
# On your laptop
GOOS=linux GOARCH=amd64 go build -o bin/server-new ./cmd/api
scp bin/server-new deploy@YOUR_SERVER_IP:/home/deploy/app/

# On the server
mv /home/deploy/app/server-new /home/deploy/app/server
sudo systemctl restart my-api
sudo systemctl status my-api
There is a brief downtime during the restart. For most personal projects and early-stage products, that is fine. When you need zero-downtime deployments, you need a different strategy, but that is a problem for later, when you have users who will notice.
What You Actually Learned
Getting through this process manually teaches you things you cannot learn from reading documentation:
You learn what a process is and why it needs to be managed. You learn what a reverse proxy does and why it exists. You learn how Linux manages services and how to read service logs. You learn the basic incident response loop: check status, check logs, check connectivity.
Every managed deployment platform, every container orchestrator, every cloud service is automating exactly what you just did manually. When they break in mysterious ways, this knowledge is what lets you debug them.
For a broader view of what a complete small-team DevOps setup looks like, CI/CD, monitoring, IaC, security all together, DevOps for Small Teams: A Practical Guide has the full picture. And if you are wondering why ECS Fargate instead of Kubernetes once you are ready to move off a plain VPS, Kenapa Gue Pilih ECS Fargate, Bukan Kubernetes explains the tradeoffs honestly.
The next painful lesson in the deployment journey is environment variables, specifically, what happens when you hardcode a database password in your code and then push it to GitHub. That is article 5.